
Introduction
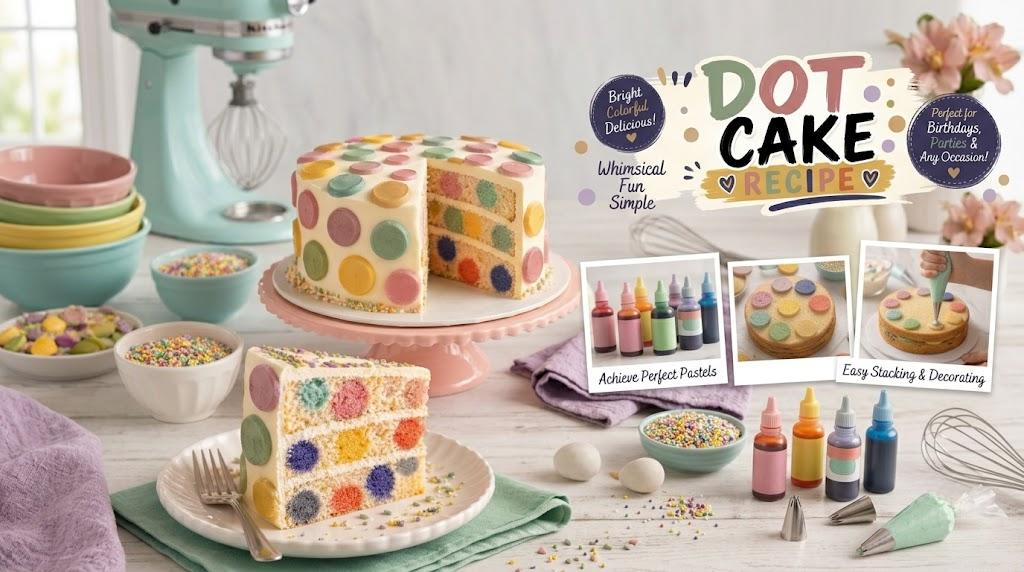
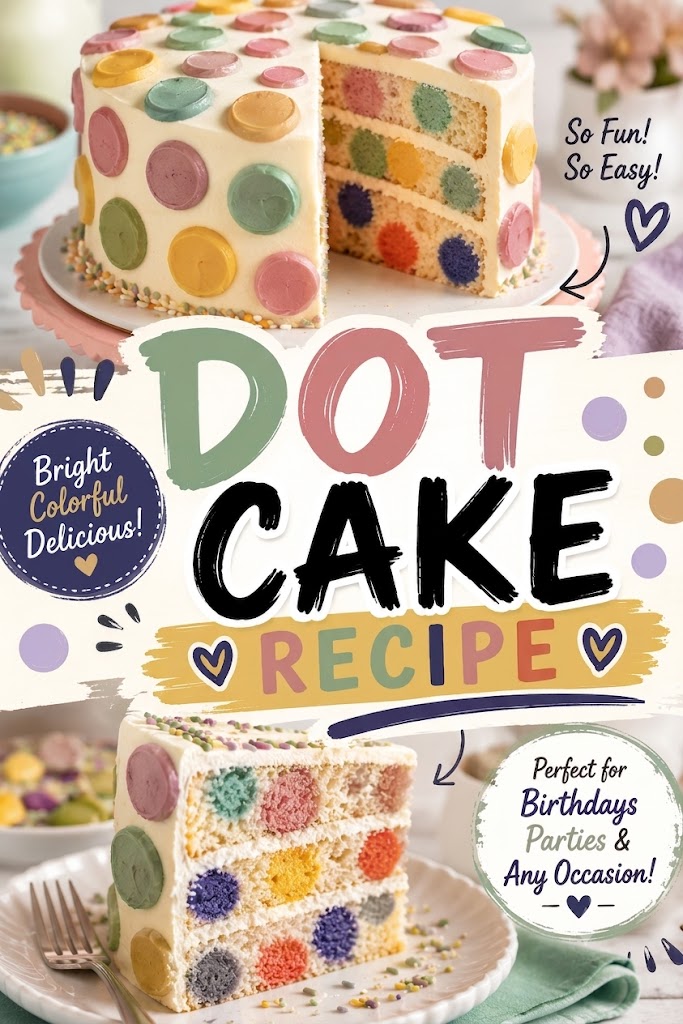
You’ve probably seen it floating around the internet and thought how on earth do those colorful dots end up INSIDE the cake?
It looks like a bakery trick. Something complicated. Something that requires professional training or a YouTube rabbit hole at midnight.
It doesn’t.
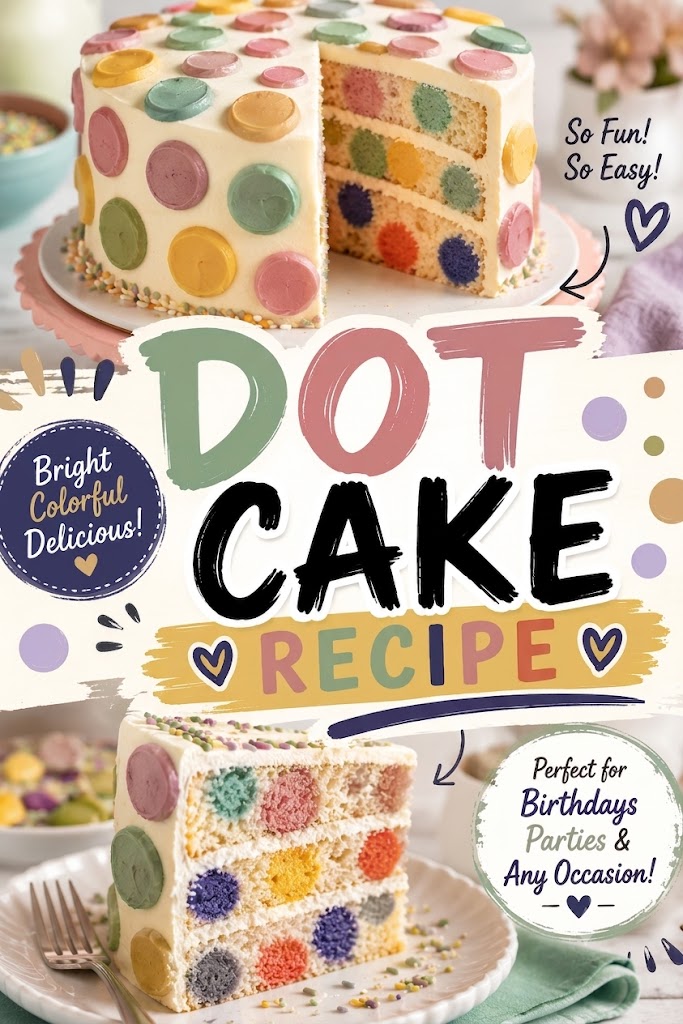
This dot cake (also called a polka dot cake) is one of those recipes where the reaction you get is wildly out of proportion to the effort you actually put in. You cut into it, the colorful confetti dots appear out of nowhere, and people genuinely gasp. Every time.
And the flavor? Soft, fluffy vanilla cake with a rich buttercream that tastes like a frosting dream. It’s the kind of cake that makes a birthday feel like a real event.
Here’s everything you need to make it happen.
Is This Recipe Halal?
✅ Yes! This recipe is 100% HALAL when you follow the guidelines below.
| Ingredient | Halal? | What to Use? |
|---|---|---|
| Butter | ⚠️ Must be Halal | Use Halal-certified butter |
| Flour | ✅ Halal | All flour is Halal |
| Sugar | ✅ Halal | All sugar is Halal |
| Eggs | ✅ Halal | All eggs are Halal |
| Milk | ✅ Halal | All milk is Halal |
| Sour cream | ✅ Halal | Use Halal-certified |
| Vanilla extract | ⚠️ Check | Use alcohol-free vanilla |
| Food coloring | ⚠️ Check | Use Halal-certified gel colors |
| Heavy cream | ✅ Halal | Use Halal-certified |
| Baking powder | ✅ Halal | All baking powder is Halal |
| Salt | ✅ Halal | All salt is Halal |
What You’ll Need
For the Vanilla Cake Layers (makes 3 x 8-inch layers)
| Ingredient | Quantity |
|---|---|
| All-purpose flour | 3 cups (375g) |
| Baking powder | 2 1/2 teaspoons |
| Salt | 1/2 teaspoon |
| Halal butter (softened) | 1 cup (225g) |
| Granulated sugar | 2 cups (400g) |
| Eggs (room temperature) | 4 large |
| Alcohol-free vanilla | 1 tablespoon |
| Whole milk (room temperature) | 1 cup (240ml) |
| Sour cream (room temperature) | 1/2 cup (120ml) |
For the Colorful Dot Cake Layer (makes 1 thinner sheet cake)
| Ingredient | Quantity |
|---|---|
| All-purpose flour | 1 1/2 cups (188g) |
| Baking powder | 1 1/4 teaspoons |
| Salt | 1/4 teaspoon |
| Halal butter (softened) | 1/2 cup (115g) |
| Granulated sugar | 1 cup (200g) |
| Eggs (room temperature) | 2 large |
| Alcohol-free vanilla | 1 teaspoon |
| Whole milk (room temperature) | 1/2 cup (120ml) |
| Sour cream (room temperature) | 1/4 cup (60ml) |
| Halal gel food coloring | 6+ colors (pink, teal, yellow, purple, orange, green) |
For the Vanilla Buttercream Frosting
| Ingredient | Quantity |
|---|---|
| Halal butter (softened) | 2 cups (450g) |
| Powdered sugar (sifted) | 6 cups (720g) |
| Heavy cream or whole milk | 4-5 tablespoons |
| Alcohol-free vanilla | 2 teaspoons |
| Salt | A pinch |
Tools You’ll Need
- Three 8-inch round cake pans
- One 9×13-inch sheet cake pan (for the dot layer)
- Stand mixer or hand mixer
- Multiple small mixing bowls (one per color)
- Round cookie cutters or small biscuit cutters (1 to 1.5 inches in diameter)
- Offset spatula
- Cake turntable (optional but makes frosting so much easier)
- Rubber spatulas
- Parchment paper
- Cooling racks
- Bench scraper
Pro Tips
- Gel food coloring is non-negotiable. Liquid food dye will mess with the batter consistency and give you sad, washed-out colors. Gel gives you those bold, saturated dots that make the whole cake pop.
- Chill the dot layer before cutting. After baking the colorful sheet cake, let it cool completely, then wrap it and stick it in the fridge for 30 minutes. Cold cake cuts cleaner. Warm cake crumbles. This step saves you frustration.
- Press the dots in firmly but gently. When you push the colored circles into your vanilla batter, make sure they’re snug but not smooshed. They need to hold their shape through the bake. Think confident, not aggressive.
- Don’t skimp on room temperature ingredients. Cold butter and cold eggs are the enemies of a smooth batter. Take everything out of the fridge at least an hour before you start. This one habit changes your baking results across the board.
- Frost with a crumb coat first. A thin layer of buttercream sealed and chilled before the final coat is what gives you that clean, polished exterior. Skip it and you’ll be fighting crumbs in your frosting the whole time.
Substitutions and Variations (All 100% Halal)
Dairy-free: Swap butter for vegan butter, whole milk for full-fat oat milk or coconut milk, and sour cream for coconut cream.
Gluten-free: A 1:1 gluten-free baking flour works well here. The texture will be slightly denser but still delicious.
Flavor variations: Add lemon zest + 1 tsp lemon extract for a citrus version. Or swap vanilla extract for almond extract for a more floral flavor.
Chocolate exterior, colorful dots inside: Make a chocolate buttercream for the outside frosting. The contrast with the colorful interior is genuinely stunning.
Sprinkles on the outside: Press rainbow sprinkles onto the sides of the frosted cake for extra celebration energy.
Make-Ahead Tips
- Cake layers: Bake up to 2 days ahead. Wrap tightly in plastic wrap once cooled and keep at room temperature or refrigerate.
- The dot layer: Can be baked a day ahead. Wrap tightly and refrigerate. Cut the dots right before you’re ready to assemble.
- Buttercream: Make up to 5 days ahead. Store in an airtight container in the fridge. Let it come to room temperature and re-whip before using.
- Fully assembled cake: Can be assembled and crumb coated the night before. Add the final frosting layer the day of serving.
How to Make It
Step 1: Bake the Colorful Dot Layer
Preheat your oven to 350°F (175°C). Grease and line your 9×13 pan with parchment.
Make the dot layer batter: cream Halal butter and sugar until pale and fluffy (about 3 minutes). Add eggs one at a time, then the alcohol-free vanilla. Alternate adding the flour mixture and milk+sour cream, starting and ending with flour. Mix just until combined.
Divide the batter into 6 small bowls. Add a different Halal gel color to each and mix until evenly tinted.
Drop large spoonfuls of each color randomly across the prepared pan. Swirl lightly with a toothpick if you want a marbled effect, or leave as-is for distinct color zones.
Bake 18-22 minutes until a toothpick comes out clean. Cool completely. Refrigerate 30 minutes.
Step 2: Bake the Vanilla Cake Layers
Keep your oven at 350°F. Grease and line three 8-inch pans.
Whisk together flour, baking powder, and salt. In your stand mixer, beat Halal butter and sugar on medium-high for 4 minutes until very fluffy. Add eggs one at a time, scraping down the bowl after each. Add alcohol-free vanilla.
On low speed, alternate adding the flour mixture and the milk+sour cream combo in three additions, starting and ending with flour. Don’t overmix once the flour goes in.
Divide batter evenly between the three pans. But here’s where the magic starts: do not bake them yet.
Step 3: Cut and Place the Dots
Use your round cutter to cut circles from the chilled colorful sheet cake. Cut as many as you can.
Stand the circles upright in your unbaked vanilla batter, pressing them in firmly so they’re submerged. Space them randomly but don’t overcrowd. Fill any gaps with extra vanilla batter if needed.
Now bake: 28-32 minutes until the tops are golden and a toothpick comes out clean. Cool in pans 10 minutes, then turn out onto racks and cool completely.
Step 4: Make the Buttercream
Beat softened Halal butter on high for 4 minutes until pale and fluffy. This step matters for the light, airy texture.
Add sifted powdered sugar in two additions, mixing on low first to avoid a cloud of sugar. Add alcohol-free vanilla, salt, and cream one tablespoon at a time until you hit a spreadable, silky consistency. Beat on medium-high for 2 more minutes.
Step 5: Assemble and Frost
Level your cake layers if needed. Place the first layer on your cake board or plate. Spread a generous layer of buttercream. Add the second layer and repeat. Top with the third.
Apply a thin crumb coat all over the cake. Refrigerate 20-30 minutes.
Apply the final, smooth coat of buttercream. Use your bench scraper and offset spatula for clean sides. Add any decorations: rainbow sprinkles on the base, extra colored dots on top, whatever feels fun.
Cut a slice and watch the room go quiet. 🎉
Storage
Room Temperature (2 days)
- Store under a cake dome or in an airtight container
Refrigerator (5 days)
- Wrap slices individually in plastic wrap
- Let come to room temperature for 20 minutes before eating
Freezer (3 months)
- Wrap individual slices tightly in plastic wrap + foil
- Thaw overnight in the fridge
Frequently Asked Questions (FAQs)
Q1: Can I use box cake mix instead of making it from scratch?
Yes! Use two boxes of white cake mix for the main layers and one box for the dot layer. The from-scratch version does have better flavor, but the dot effect works either way.
Q2: What size cookie cutter works best for the dots?
Between 1 and 1.5 inches. Too small and the dots get lost. Too large and they take over.
Q3: Can I make this in a different size pan?
Yes. Use two 9-inch rounds instead of three 8-inch rounds for a two-layer version. Adjust bake times.
Q4: My dots disappeared after baking. What happened?
Two common culprits: the dots weren’t cold enough when placed, or the vanilla batter was too thin. Make sure your dot layer is chilled before cutting and your vanilla batter is a standard thick cake consistency.
Q5: Can I color the buttercream too?
Absolutely. A white exterior makes the colorful interior more of a surprise. But a pastel exterior with colorful inside is stunning.
Q6: Do the dots have to be randomly placed?
No rules here. You can do a polka dot pattern, cluster them by color, or arrange them in a specific shape.
Q7: Can I use fondant instead of buttercream?
Yes. You can cover the crumb-coated cake in rolled fondant.
Q8: Can I use liquid food coloring?
Not recommended. Use Halal-certified gel food coloring for bold, saturated colors.
Nutritional Information (Per Slice, Approximate)
| Nutrient | Amount |
|---|---|
| Calories | ~620 |
| Total Fat | 31g |
| Saturated Fat | 19g |
| Carbohydrates | 82g |
| Sugar | 62g |
| Protein | 5g |
| Sodium | 180mg |
Quick Summary
| Step | Action |
|---|---|
| 1 | Bake colorful sheet cake, chill, cut dots |
| 2 | Make vanilla cake batter |
| 3 | Pour batter into 3 pans |
| 4 | Press dots into unbaked batter |
| 5 | Bake 28-32 minutes, cool |
| 6 | Make buttercream |
| 7 | Level layers, frost with crumb coat |
| 8 | Apply final frosting coat |
| 9 | Decorate, slice, serve |
A cake that surprises people when it gets cut is one of those small things that creates a real memory.
Someone will take a photo. Someone will ask how you did it. Someone (probably a kid) will pick out all the dots from their slice and eat them first.
And you’ll know it wasn’t complicated at all. You’ll just let them wonder.
Go make this cake, then come back and leave a comment about how it went. Did the dots hold their shape? Which colors did you use? Did anyone actually gasp? I’d genuinely love to know.